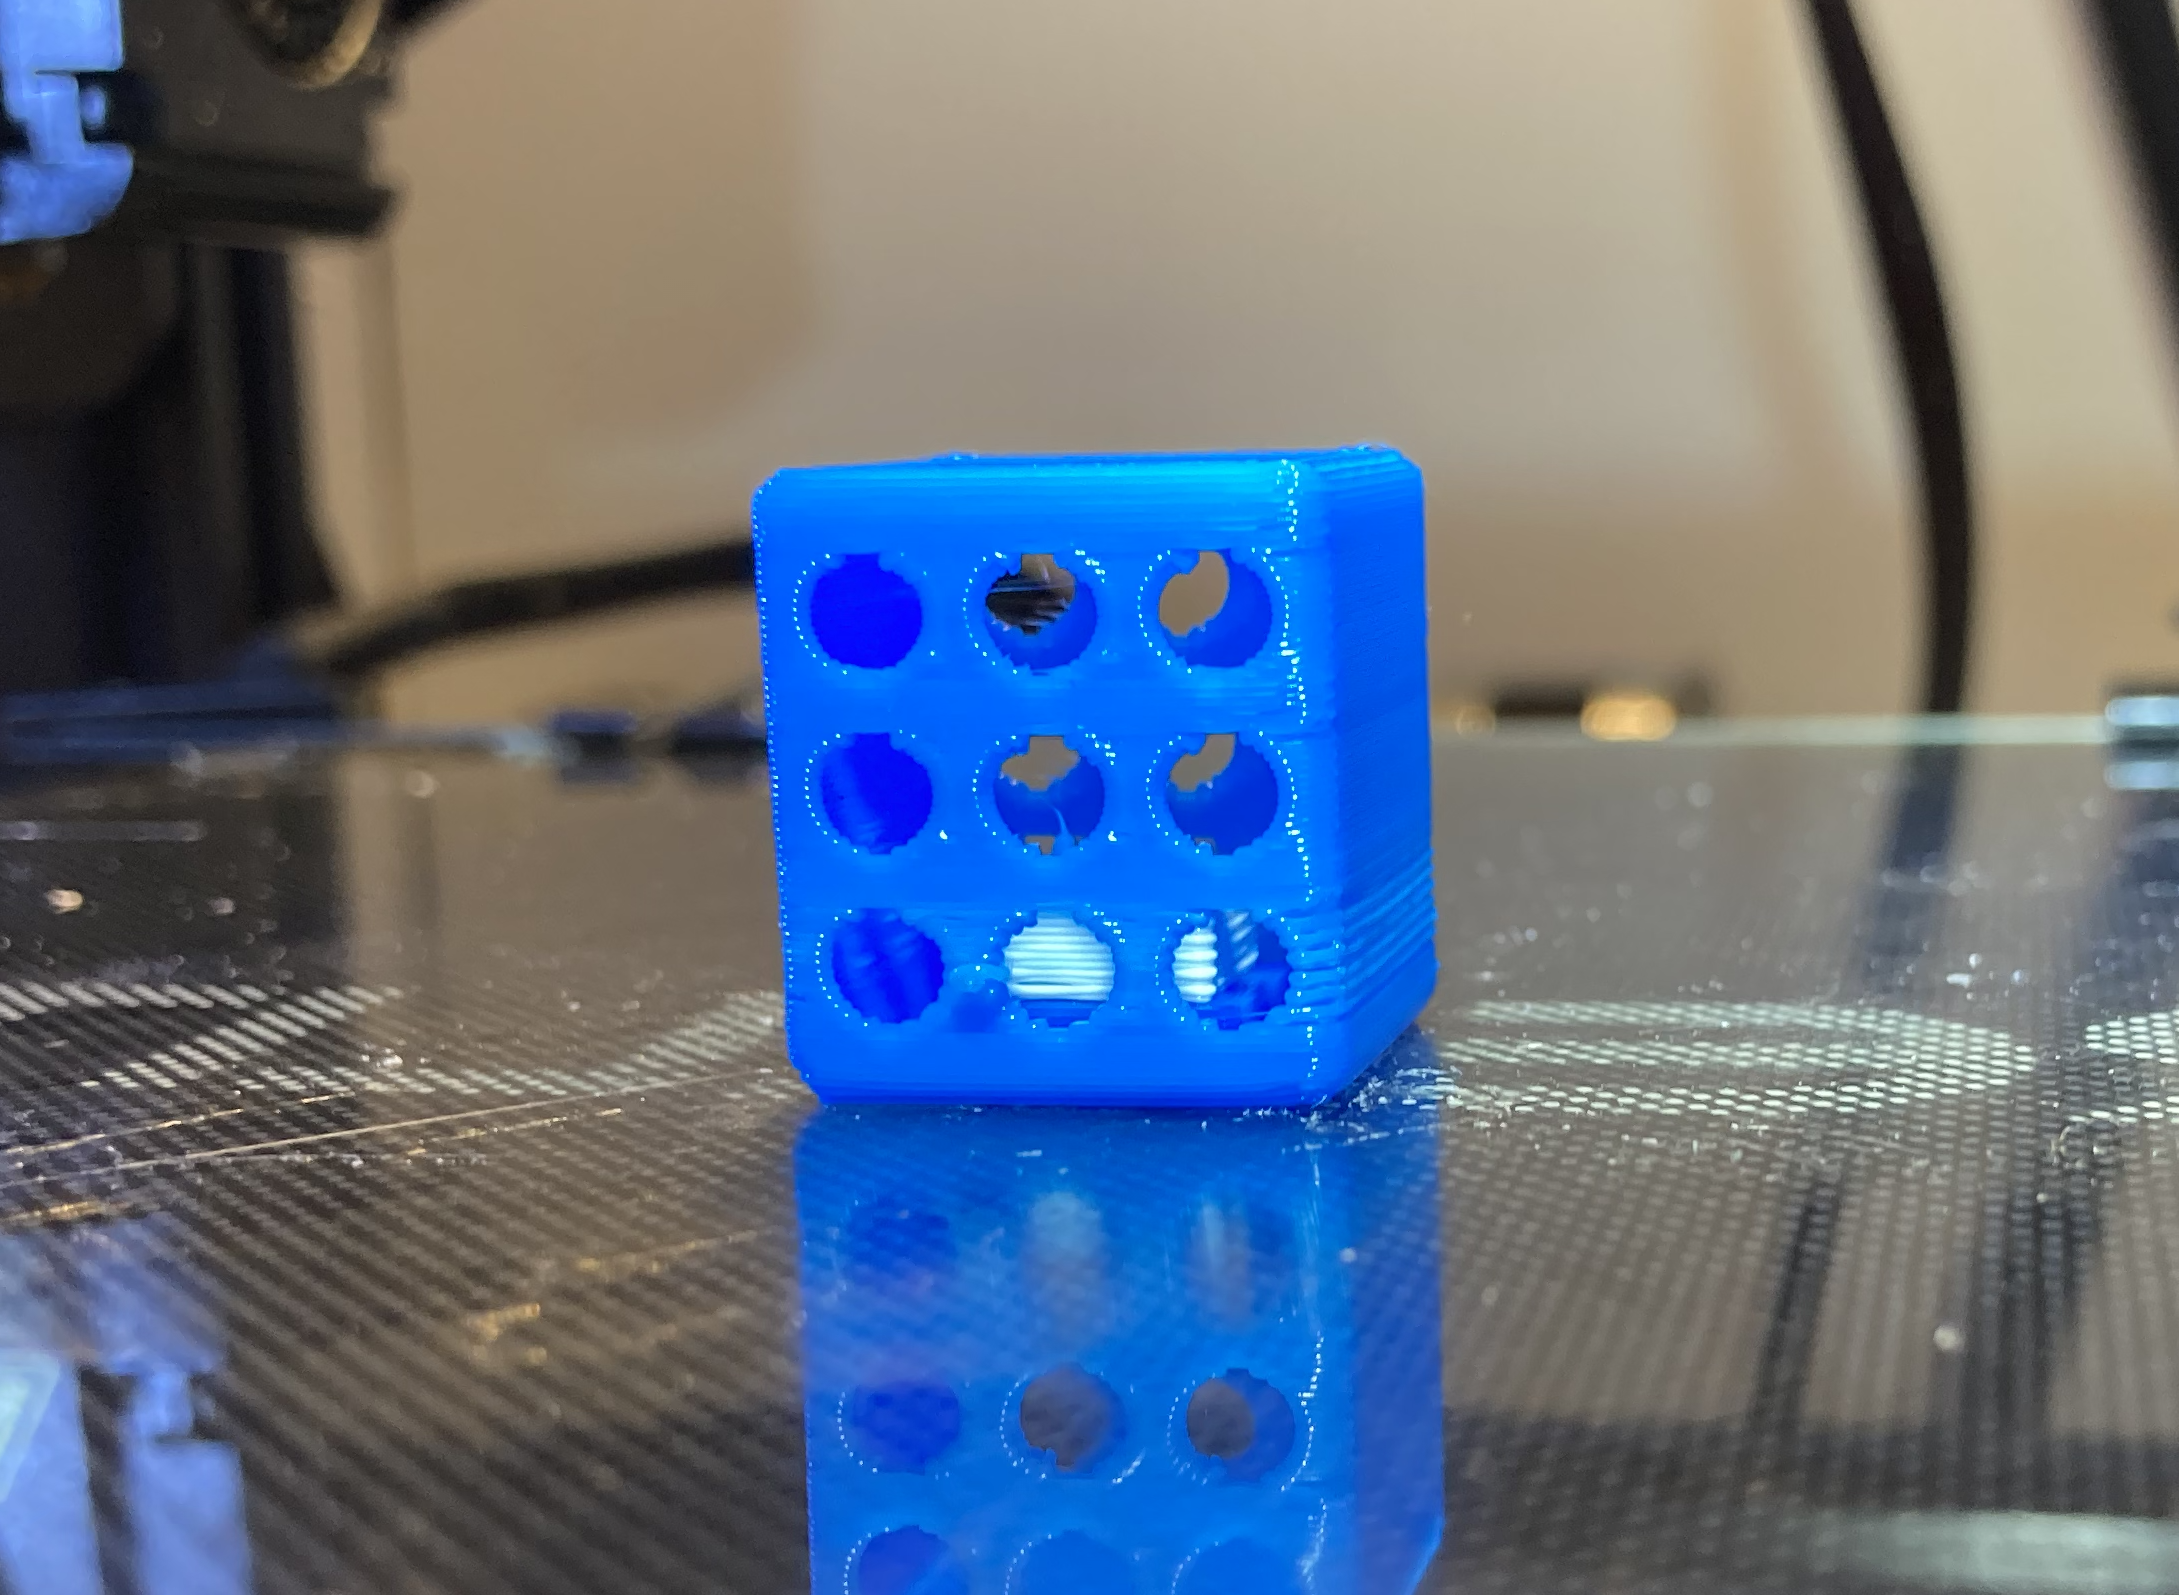
Most techniques for printing multicolor prints on single extruder FDM printers are based on swapping filaments on layer changes, for example by enabling Filament Change or Pause At Height post-processing scripts in Cura. But wouldn’t it be nice if filament changes could happen mid-layer? The following guide and scripts provided in the scholtzan/cura-multicolor-single-extruder repository show how this can be done in Cura.
The idea is to emulate a printer with multiple extruders. However, whenever an extruder change happens, the printer is instructed to perform a filament change instead.
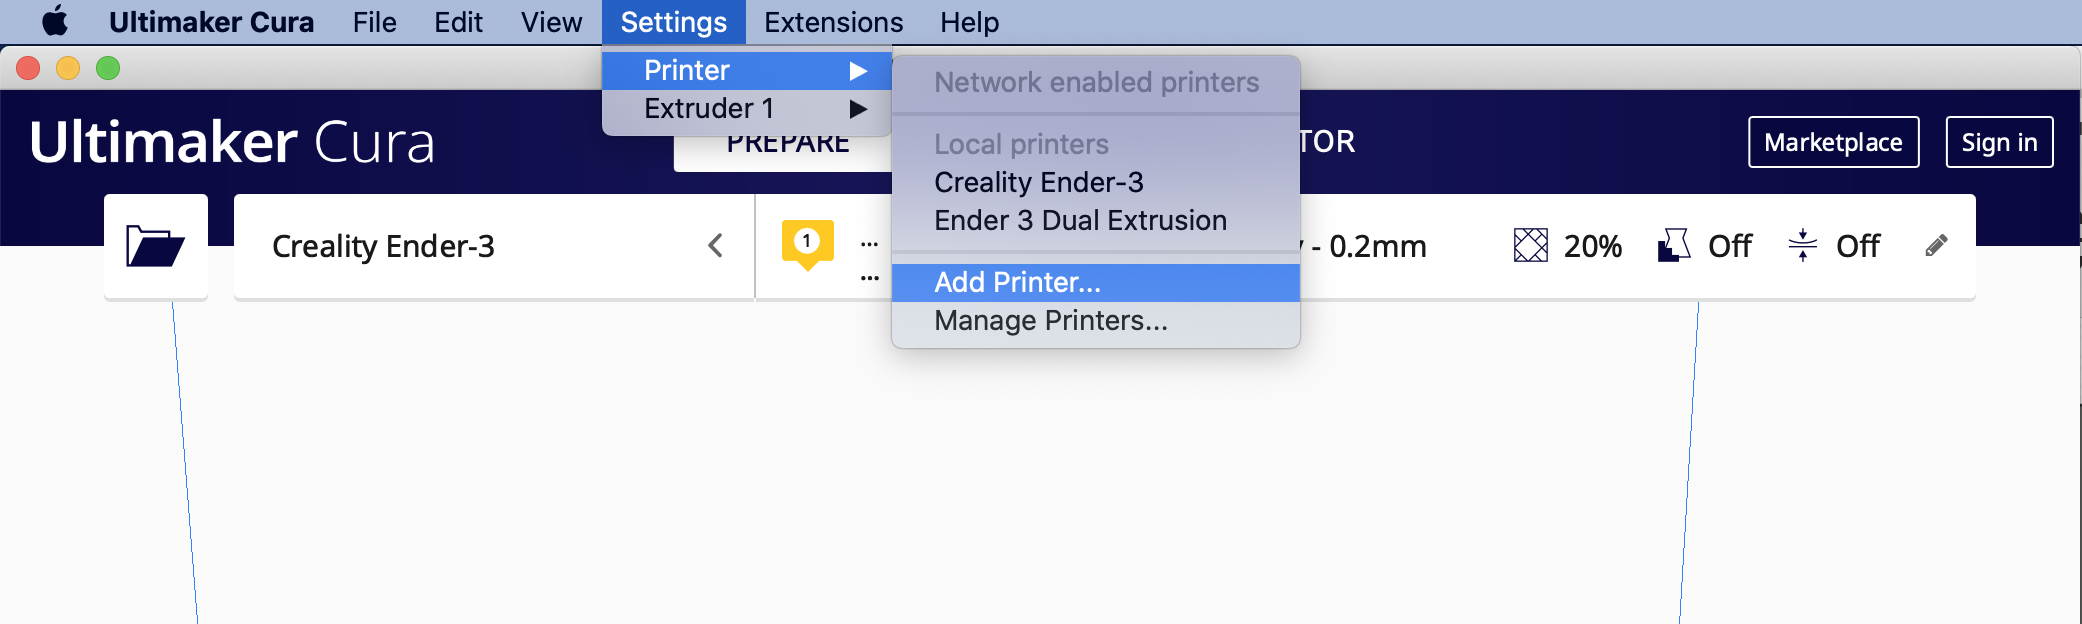
1. Setting up a printer with multiple virtual extruders
The first step is to set up a non-networked, custom FFF printer in Cura.
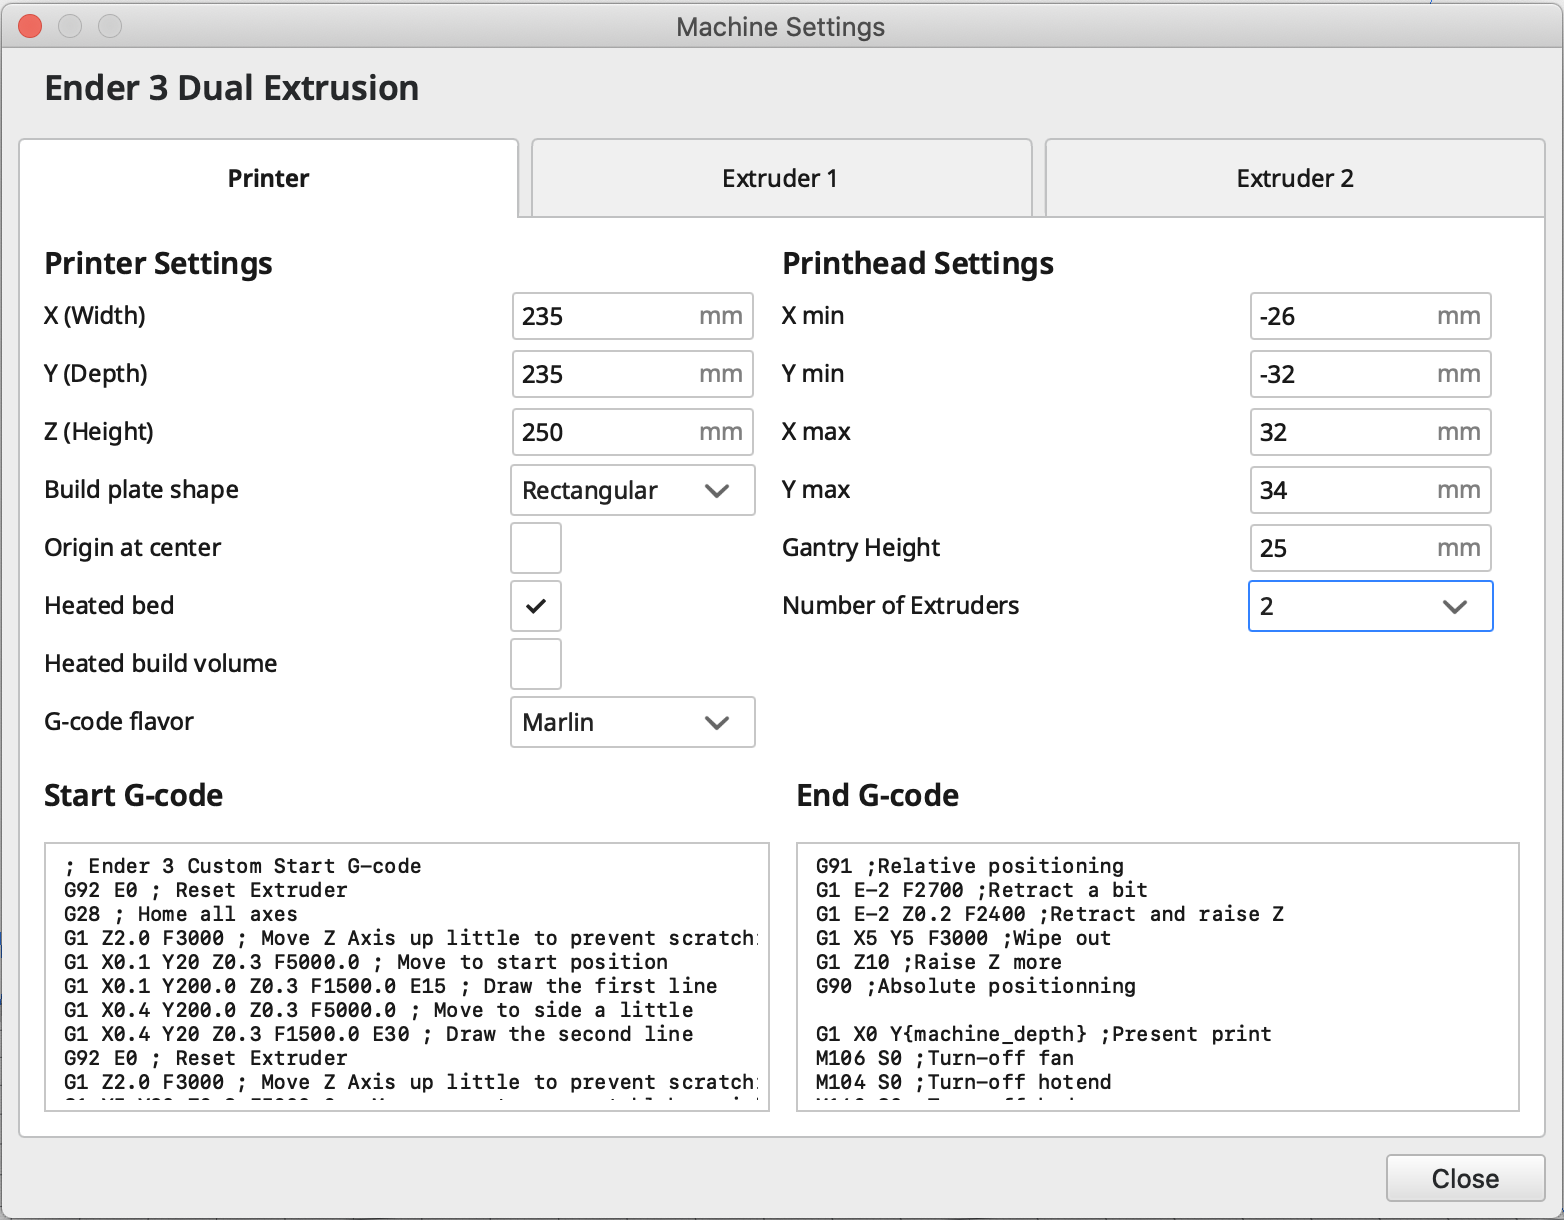
Next, machine settings need to be adjusted according to the printer specification. The easiest way is to simply copy these specifications from Curas default settings for the printer model and increase the Number of Extruders to 2 or greater, depending on how many different colors prints will have.
2. Post-processing configuration
When slicing Cura needs to modify the generated G-Code in post-processing to instruct the printer to perform a filament instead of an extruder change.
There are two options to achieve this:
- The most convenient option is to install the post-processing scripts provided in in the scholtzan/cura-multicolor-single-extruder repository and enable one of them when slicing models
- Cura has an option to manually insert a snippet of G-Code when an extruder changes
Both options, including advantages and disadvantages, are described in the following.
Option 1: Installing post-processing scripts
The scholtzan/cura-multicolor-single-extruder repository contains two Python scripts: FilamentChangeOnToolChange.py and PauseAtHeightOnToolChange.py
To install these as post-processing scripts in Cura, first, download the files. Next, open Cura’s configuration folder. The path to the configuration directory can be found in Cura under Help → Show Configuration Folder.
The configuration folder contains a scripts/ subdirectory. Copy both scripts into scripts/, then restart Cura.
Both scripts should now show up when configuring post-processing in Cura under Extensions → Post-Processing → Modify G-Code.
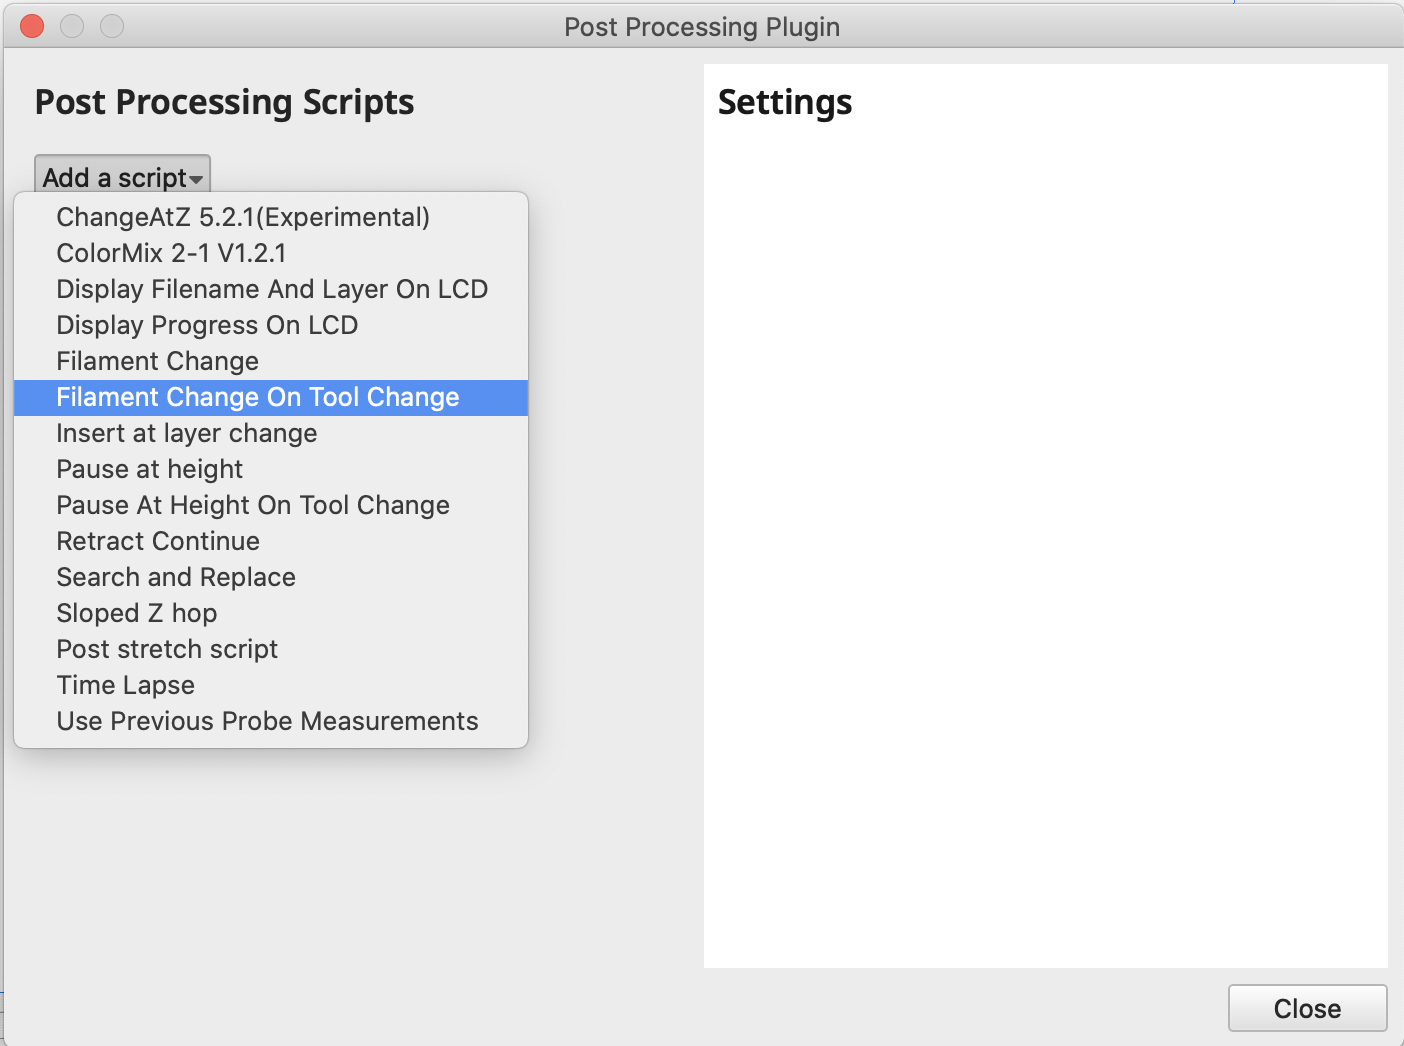
Only one of the two needs to be activated. Each script has a slightly different in how the filament change is initiated and explained more in detail in the following.
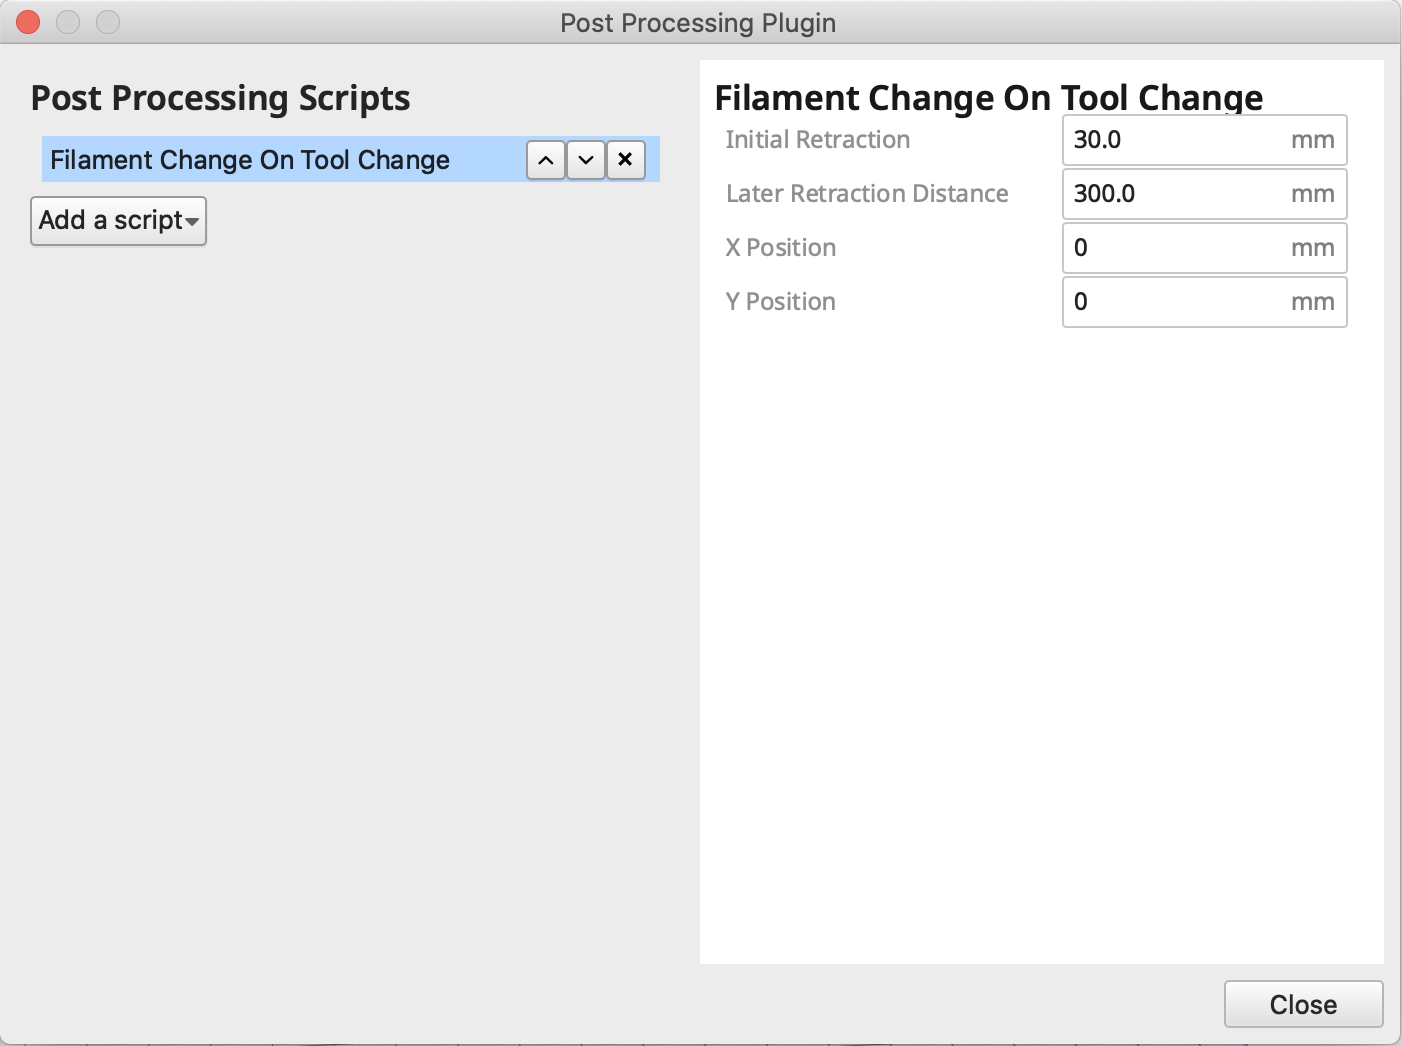
a. Filament Change On Tool Change
The Filament Change On Tool Change script inserts a M600 command into the G-Code.
- Advantages:
- This script will go through the filament change via the printers built-in LCD controller.
- Disadvantages:
- Requires
ADVANCED_PAUSE_FEATUREand printer to have an LCD controller. - When using Octoprint, it is not possible to manually extrude or retract filament via the Octoprint interface, everything needs to be done via the printers LCD module.
- It is not possible to manually retract, e.g. if the Later Retraction Distance has been configured to a distance that is shorter than the Bowden tube and the filament is still partially inside it, it is not possible to retract more filament (tested on Ender 3, possibly different for other printer models)
- Requires
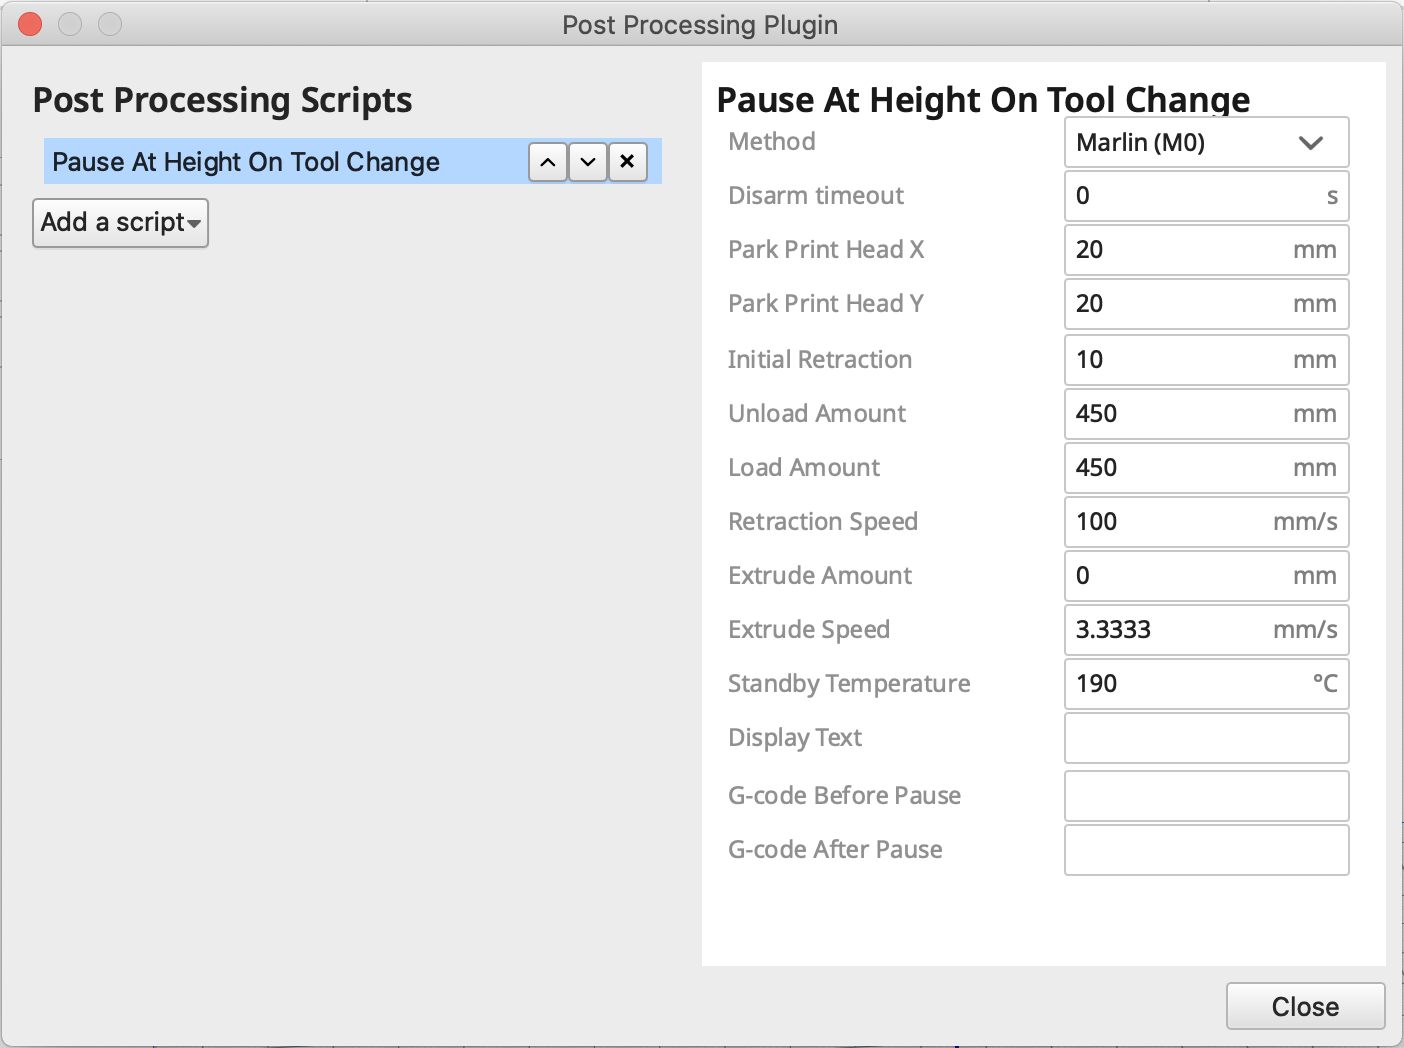
b. Pause At Height On Tool Change
The Pause At Height On Tool Change script inserts commands into the G-Code that move the extruder head to a specific position and waits for the print to be resumed. The filament change can be performed while the print is paused. The script also allows to specify a Load Amount, which is the amount extruded once the filament has been loaded. There is another pause after the load amount has been extruded allowing to remove excess filament from the nozzle or to manually extrude more filament.
- Advantages:
- Supports all printers, doesn’t require an LCD controller.
- Fast filament load and unload options.
- Filament can be retracted and extruded manually via Octoprint.
- More configuration options.
- Disadvantages:
- No walkthrough via the LCD controller.
- Manual extrusion/retraction necessary.
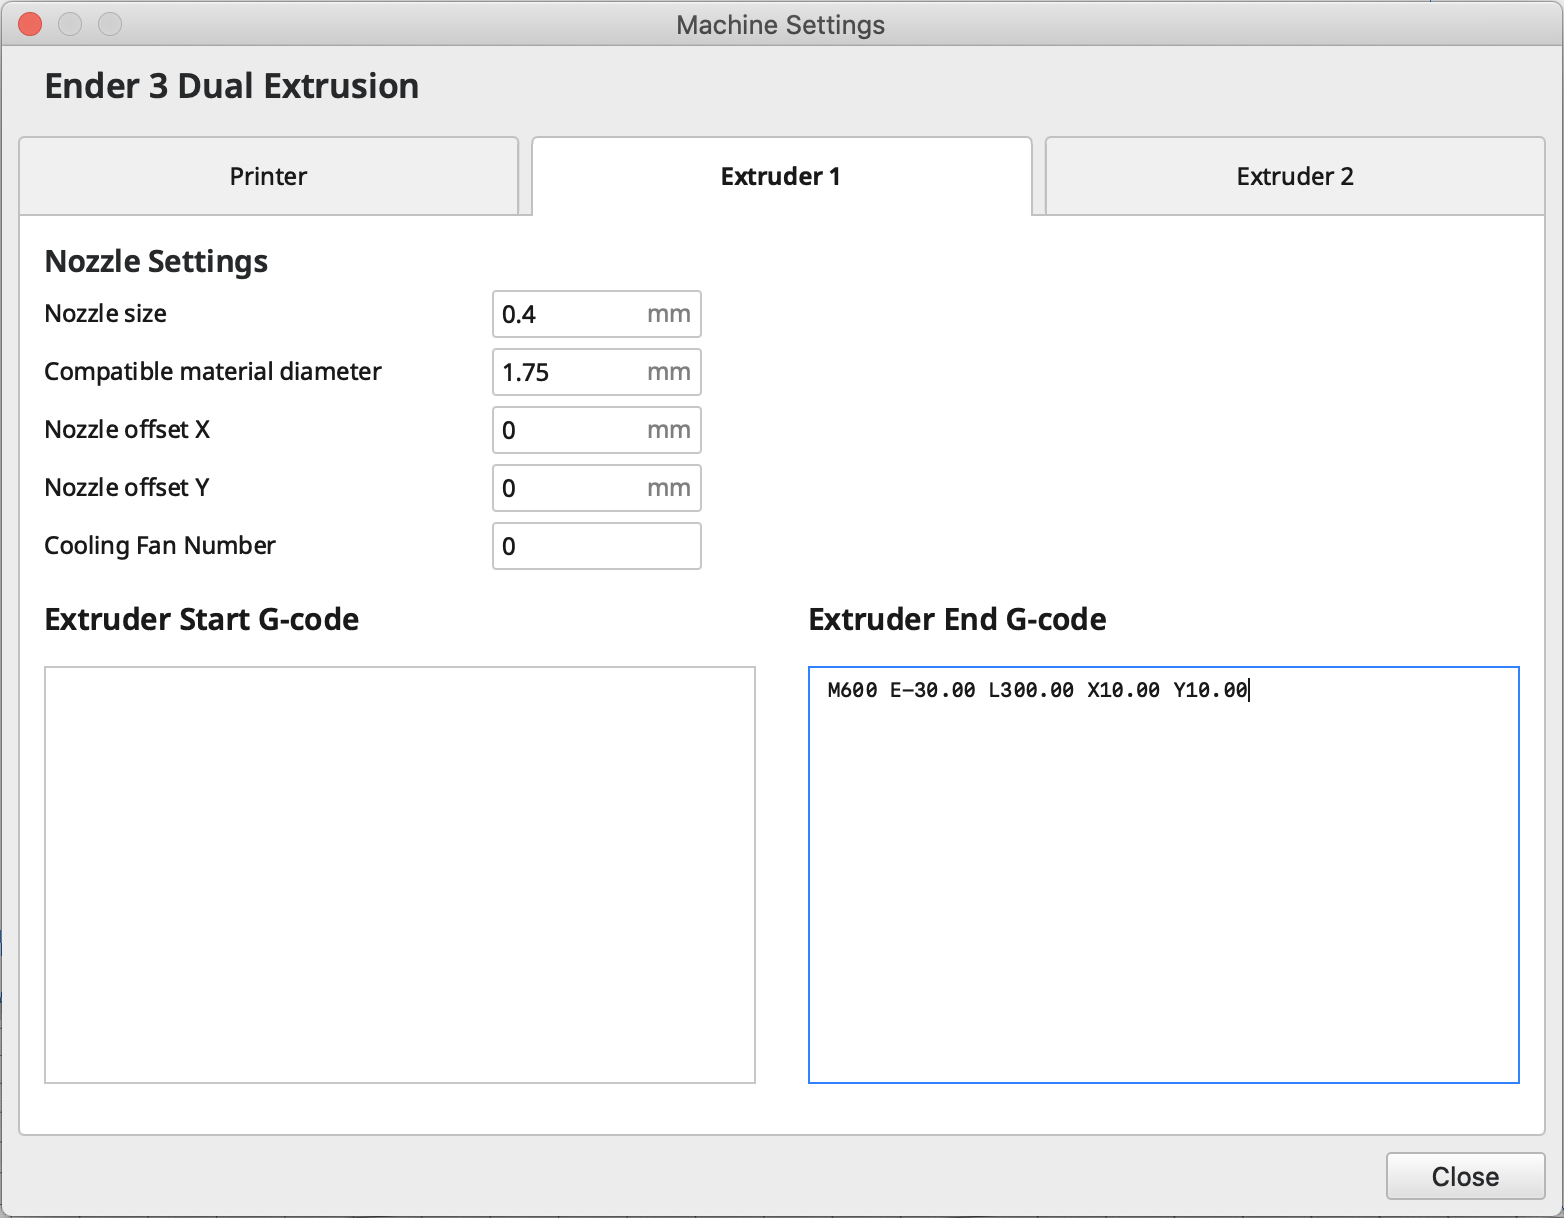
Option 2: Modifying the extruder End G-Code
It is also possible to avoid installing the post-processing scripts and manually insert the M600 Filament change command for each extruder under the End G-Code section in the machine settings.
- Advantages:
- No need to install post-processing scripts.
- Disadvantages:
- G-Code still contains tool change command, which should get ignored by the printer but causes a warning to pop up in Octoprint.
- Less convenient to configure and needs to be inserted for each extruder.
- Only feasible for
M600command, which might not be supported by all printers.
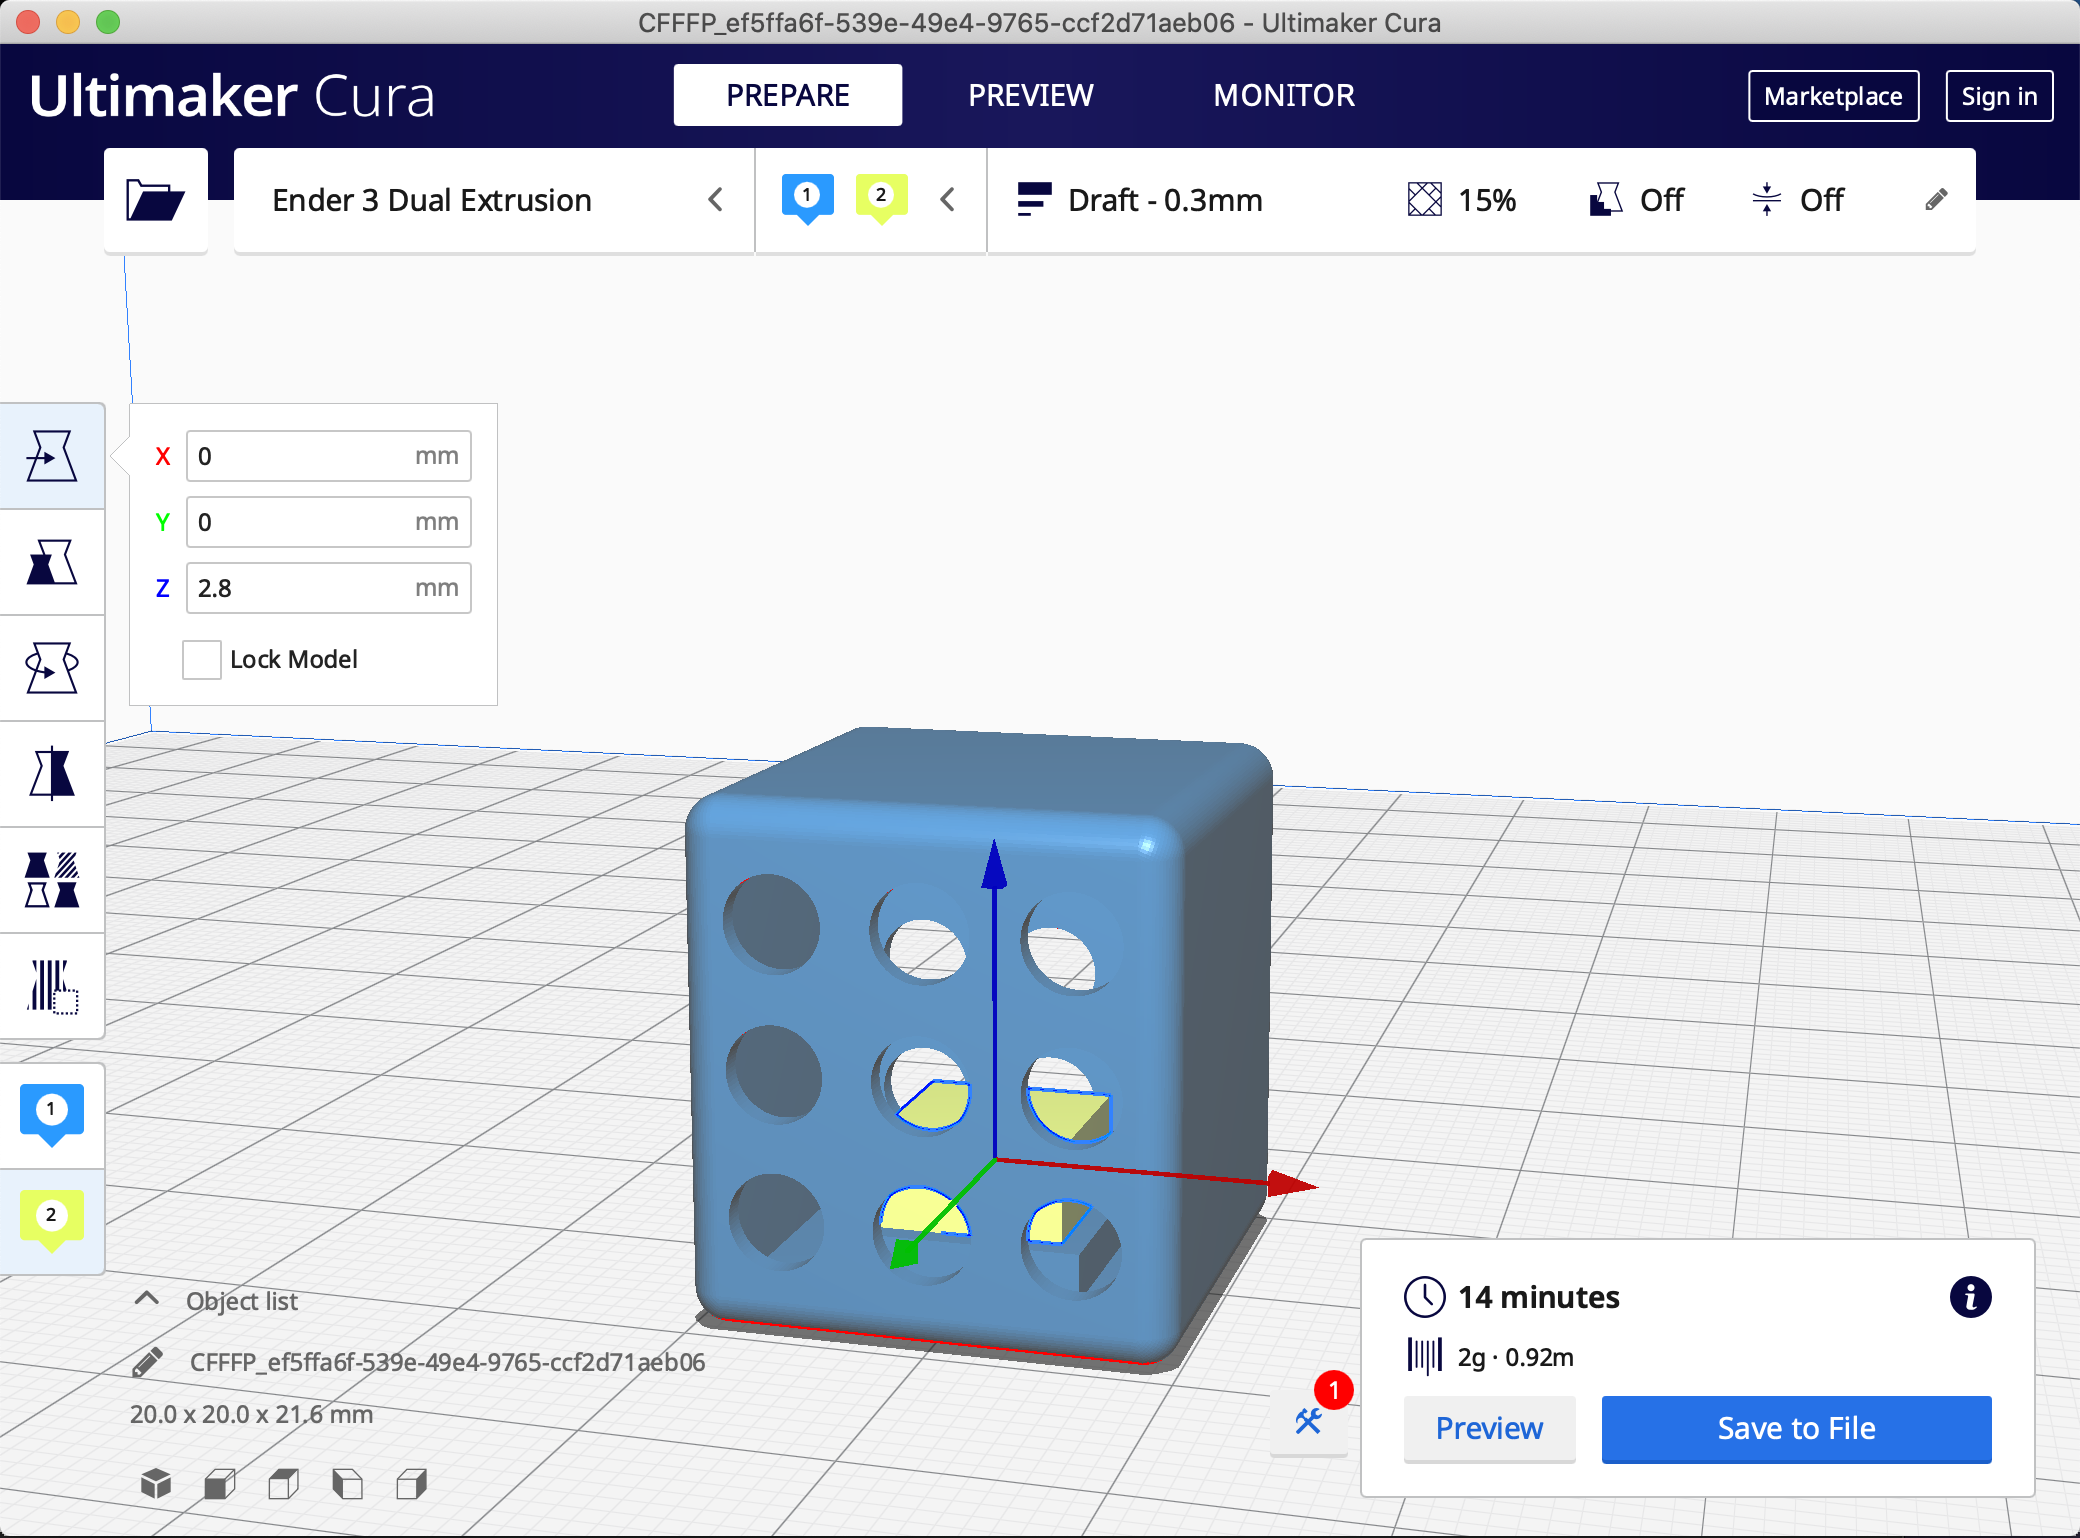
3. Slicing
Once one of the post-processing scripts has been activated and configured, it is time to slice the model. Multicolor models usually consist of multiple parts that are printed in different colors but aligned to result in a single object.
Import all model parts, make sure they are aligned correctly and select the right extruder for each model part (on the left toolbar). Colors for each extruder can be adjusted in the settings.
Some additional useful settings:
- To reduce blobs, it is recommended to Enable Prime Tower, however this causes a filament change to happen on every layer.
- Merged Meshes Overlap controls how large the overlap between the different models is. A larger overlap can result in a stronger connection.
Slice the model and save the G-Code file.
4. Printing
Finally, the G-Code can be loaded onto the printer and the print can begin. This step can become a bit cumbersome depending on the number of filament changes required.
If the Filament Change On Tool Change script was used for slicing, the printer will beep whenever the filament needs to be changed and instructions that appear on the LCD need to be followed.
If the Pause At Height On Tool Change scripts was used for slicing, the filament change needs to be performed manually and once completed Resume needs to be triggered.